Once you have received your Oxford Brookes Padlet account details by email, go to the Padlet website and sign into your Oxford Brookes padlet account. Create a new Padlet by selecting ‘Make A Padlet’.
Select a blank ‘type’ (More on Which Padlet style should I select?): Wall, Canvas, Stream etc (Wall is the most common) and start working on your Padlet wall in the ‘Modify This Wall’ menu (this is where you can edit your Padlet settings in the future).
At this stage you should:
- Change the title and description
- Select the appearance (choose a fairly plain background to assist accessibility)
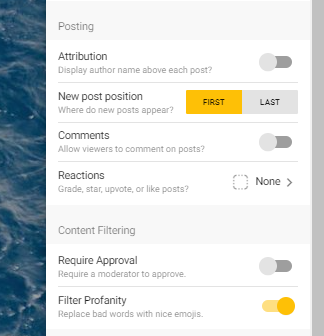
- Switch on the ‘profanity filter’
- Choose if you want to switch on or off ‘require approval’ for posts. We recommend keeping this setting switched off as avoid you having to approve all posts.
If you wish to collaborate with another lecturer on your Padlet, you can invite them via the ‘share’ option then ‘Add Members’. The invited lecturer will also need an Oxford Brookes Padlet licence. Do not add students’ names as they would require licences and all licences are for teaching staff only.
Make sure that the ‘Privacy’ setting is set to ‘Secret’ (this is set by default). This is important for GDPR purposes and will ensure only users you have shared the Padlet with via a Moodle page will be able to view and contribute to that Padlet. Remind students not to share personal details such as their full name, location, medical history and not to share the Padlet link with other students on email or social media.
How do I create a Padlet (video 1 min 52 secs) - watch fullscreen

